Instructions on Blocking/Whitelisting an Email Address
One of the most common tickets we get in the Support Department is how to allow or block an email from a client/vendor. Spam filters have come a long way in the past few years but they are no match for the human eye and sometimes they go haywire. Let’s go over how to make this process easier for you.
Outlook user instructions:
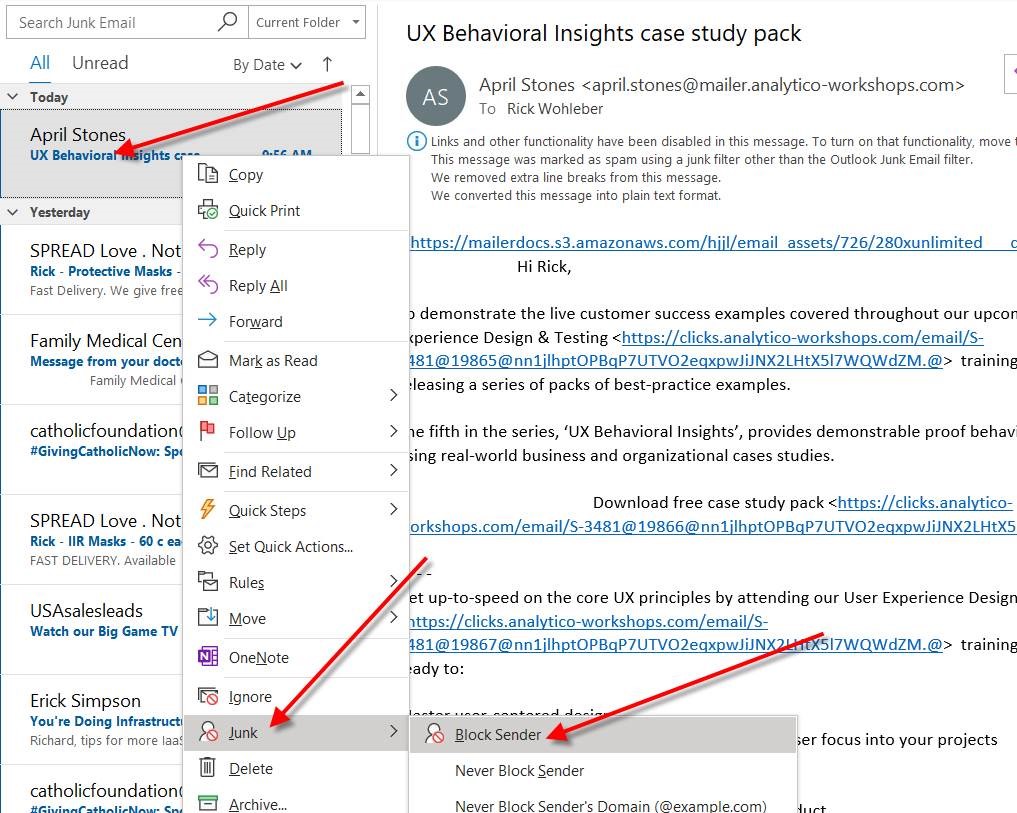
Much of this is now done directly out of Outlook by you, the end user. Let’s first go over how it is done inside Outlook (see the red arrows in the pictures below):
- RIGHT-CLICK on the email in question
- Scroll down and LEFT-CLICK “Junk”
- Look to the right little window that pops up
- Choose “Block Sender” to permanently block that email address. OR….
- Choose “Never Block Sender” to permanently allow that email address.

Note that this setting is only going to work if their Outlook is open on your computer. For MOBILE ONLY users please see the MOBILE / OWA instructions.
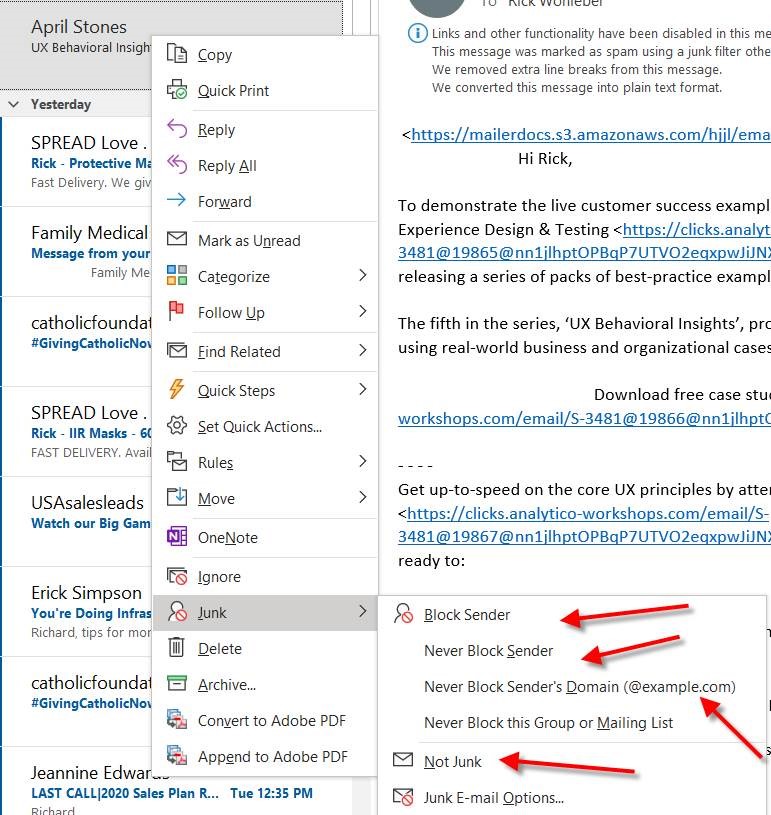
Note that in Outlook the same process can be done in REVERSE for messages that are in the Junk folder:
- RIGHT-CLICK on the email in question
- Scroll down and LEFT-CLICK “Junk”
- Look to the right little window that pops up
- Choose “Block Sender” to permanently block that email address. OR….
- Choose “Never Block Sender” to permanently allow that email address. Or…
- Choose “Never Block Sender’s Domain (@example.com) to permanently allow all emails from a domain
- Choose “Not Junk” to mark that particular message as good and move it back into the original folder that it came from (usually your Inbox)

For MOBILE ONLY users (those without a computer they use regularly) they can do this via Outlook Web Access. Outlook users can do this as well btw and then Outlook does not need to be running. Follow these instructions:
- Open a browser on a computer to https://office.com
- Enter your email address and email password
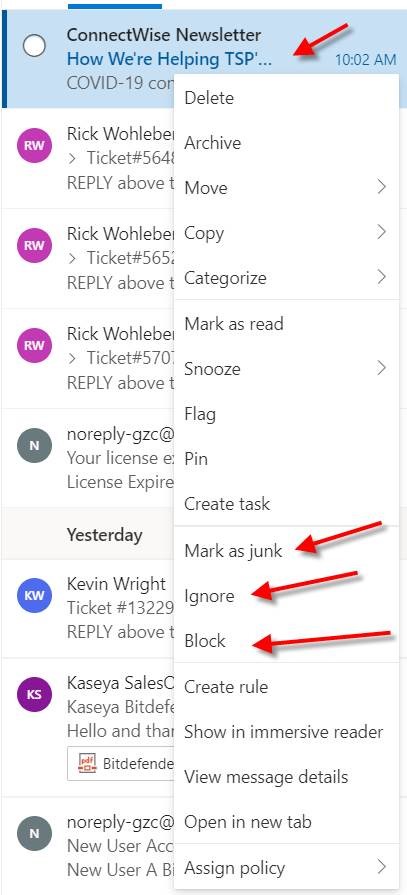
- RIGHT-CLICK on the message in your Inbox and select “Mark as junk” to always send email from that email address to the Junk folder.
- Note that there are other options as well – Ignore (never filter this email sender for Junk Mail) and Block (which means simply BLOCK the email sender, never even put it into Junk, simply reject it).

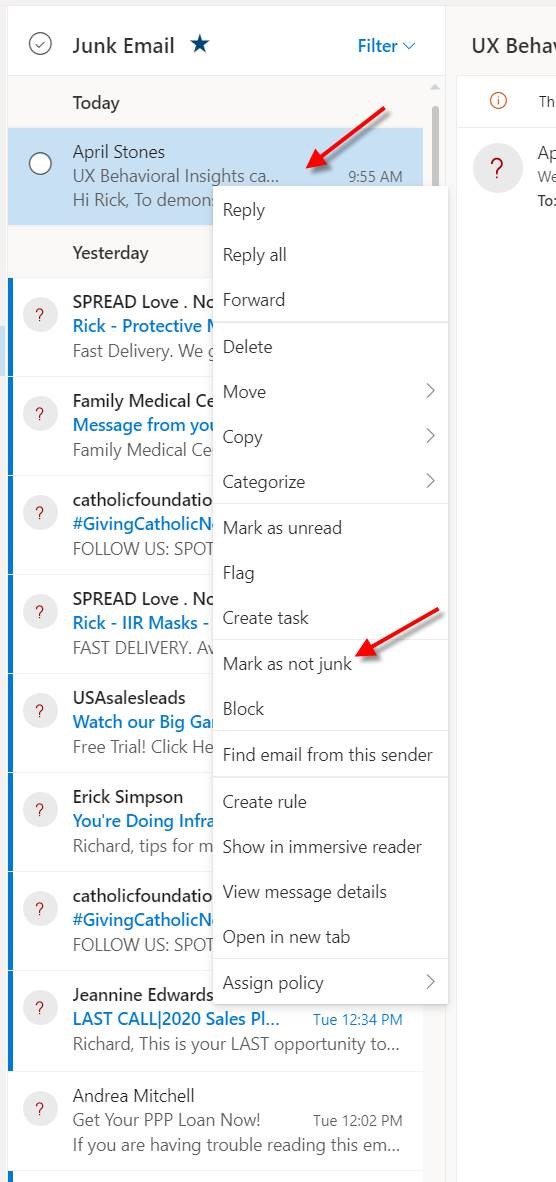
Note that in Outlook Web Access the same process can be done in REVERSE for messages that are in the Junk folder:
- Open a browser on a computer to https://office.com
- Enter your email address and email password
- RIGHT-CLICK on the message in your Junk Mail and select “Mark as not junk” to always allow email from that email address

I hope all that helps! As always, feel free to contact support in any number of ways:
- Email support@cft.com, and we’ll be happy to fix you up
- Call our Support department at 407-420-1800 ext 2
- If you are on a managed system, look for the blue shield in your taskbar and double-click it – a web form will pop up and you can make your ticket that way.
Lots of ways to skin the cat, but at the end of the day we’re here to help!
Rick Wohleber | President
Central Florida Technology
1717 South Rio Grande Avenue | Orlando, Florida 32805
P 407.420.1800 x201 | F 321-206-5172

LEAVE A REPLY